Forum home Problem solving
This Forum will close on Wednesday 27 March, 2024. Please refer to the announcement on the Discussions page for further detail.

Lower a couple of drains

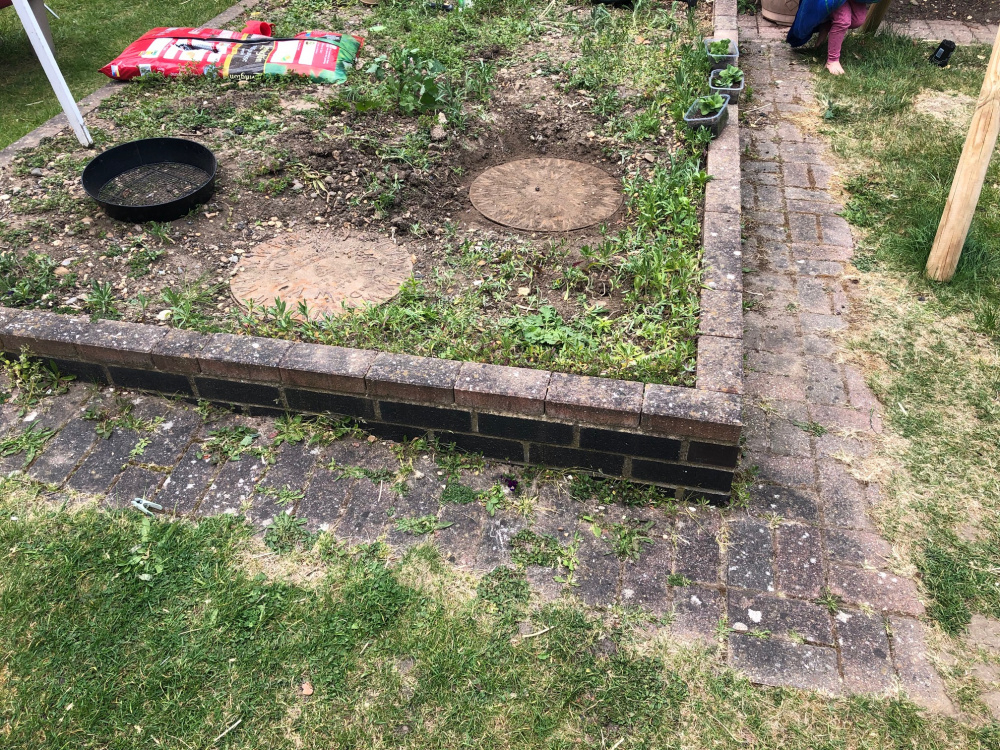
Hi, I've got a raised bed in the centre of our garden, I tried taking it out only to find two drains buried in it. I've opened them both up and there's around a foot of drop before it slopes away and I was wondering if it's possible to lower this so that it's at the same height as the rest of the lawn and then cover it with a recessed cover that can contain grass so that it just looks like a part of the lawn?

The drains are around 400mm wide. If anyone can provide a link to the types of cover that i'd need that would be great.

This is a picture of what I found.
Posts

  • mrtjformanmrtjforman Posts: 331
    edited May 2020
    We used to have an electricity box in our garden - belonged to the council.

    I have a drain in my current garden - belongs to the council.

    So just be careful altering telephone masts, lamp posts, electricity boxes or drains that belong to the council. Seems like a lot of work.

    Could be an abandoned one - really don't know but I would find out before making any changes

    It's probably the reason the previous owners made a flower bed to cover them up
  • SmudgeriiSmudgerii Posts: 185
    edited May 2020
    There are ‘rules’ on ownership.  If they only take your properties waste / surface water then the responsibilty lies with you.  If they take waste / surface water from other properties then they are the Utility companies responsibility and you would need to request the work to be done.  They won’t do it for cosmetic reasons, but if they were damaged and dangerous....
  • ThebigeasyThebigeasy Posts: 190
    A 1ft drop suggest there is only 1 riser on it, you might be able to cut it down a bit as it should be plastic but you may encounter smells from the drain. You will not be be able to sink it any further without replacing the main lines. 
  • alan.lambalan.lamb Posts: 4
    Just checked and there’s actually 22 inches of drop and there’s a few sections to the pipe so I wonder if its as simple as digging it out and then removing one of the sections and putting the top back on?
  • ThebigeasyThebigeasy Posts: 190
    alan.lamb said:
    Just checked and there’s actually 22 inches of drop and there’s a few sections to the pipe so I wonder if its as simple as digging it out and then removing one of the sections and putting the top back on?
    Is that 22" to the bottom of the channel? You should be ableto see the joint if there is more than one section. 
  • alan.lambalan.lamb Posts: 4
    Yeah, it’s 22 inches from the cover to the bottom where it then slopes away underground. I can see the pipe going down appears to be in sections as there are a couple of rings around the pipe as it goes down.
  • ThebigeasyThebigeasy Posts: 190
    alan.lamb said:
    Yeah, it’s 22 inches from the cover to the bottom where it then slopes away underground. I can see the pipe going down appears to be in sections as there are a couple of rings around the pipe as it goes down.

    alan.lamb said:
    Yeah, it’s 22 inches from the cover to the bottom where it then slopes away underground. I can see the pipe going down appears to be in sections as there are a couple of rings around the pipe as it goes down.


    Any chance of picture? Risers are they plastic, usually are if the are round, each riser  is usually about 300mm or 12 inches. 
  • alan.lambalan.lamb Posts: 4
    Here's the inside of one of the drain, the other is exactly the same. I'm thinking it might be possible to take the small top ring off, remove the next one and then put the top one back on at the lower point.


  • ThebigeasyThebigeasy Posts: 190
    alan.lamb said:
    Here's the inside of one of the drain, the other is exactly the same. I'm thinking it might be possible to take the small top ring off, remove the next one and then put the top one back on at the lower point.


    Thats one and a half risers, so yes take the top one off and replace the lid, just make sure clear it all  before removing to avoid it falling into the drain. 
  • SmudgeriiSmudgerii Posts: 185
    alan.lamb said:
    Here's the inside of one of the drain, the other is exactly the same. I'm thinking it might be possible to take the small top ring off, remove the next one and then put the top one back on at the lower point.


    Be sure the drain is yours before doing it, if it’s a ‘shared’ drain and drain becomes damaged/blocked by your work you would be liable for the reinstatment costs.  
Sign In or Register to comment.